Guide · 13 steps
Build a compatible setup
Assemble a suppressor, mount, muzzle device, and front cap into one configuration, and watch Baffled check fit and recompute length, weight, and price as you go.
Open the BuilderStep 1: Open the Builder
Open Builder from the navigation. It starts as a single orientation card with four ways in: add a suppressor (the recommended start), add a mount, add a muzzle device, or add a barrel thread. Whichever part you add first anchors the build, and from then on Baffled only shows pieces compatible with it.
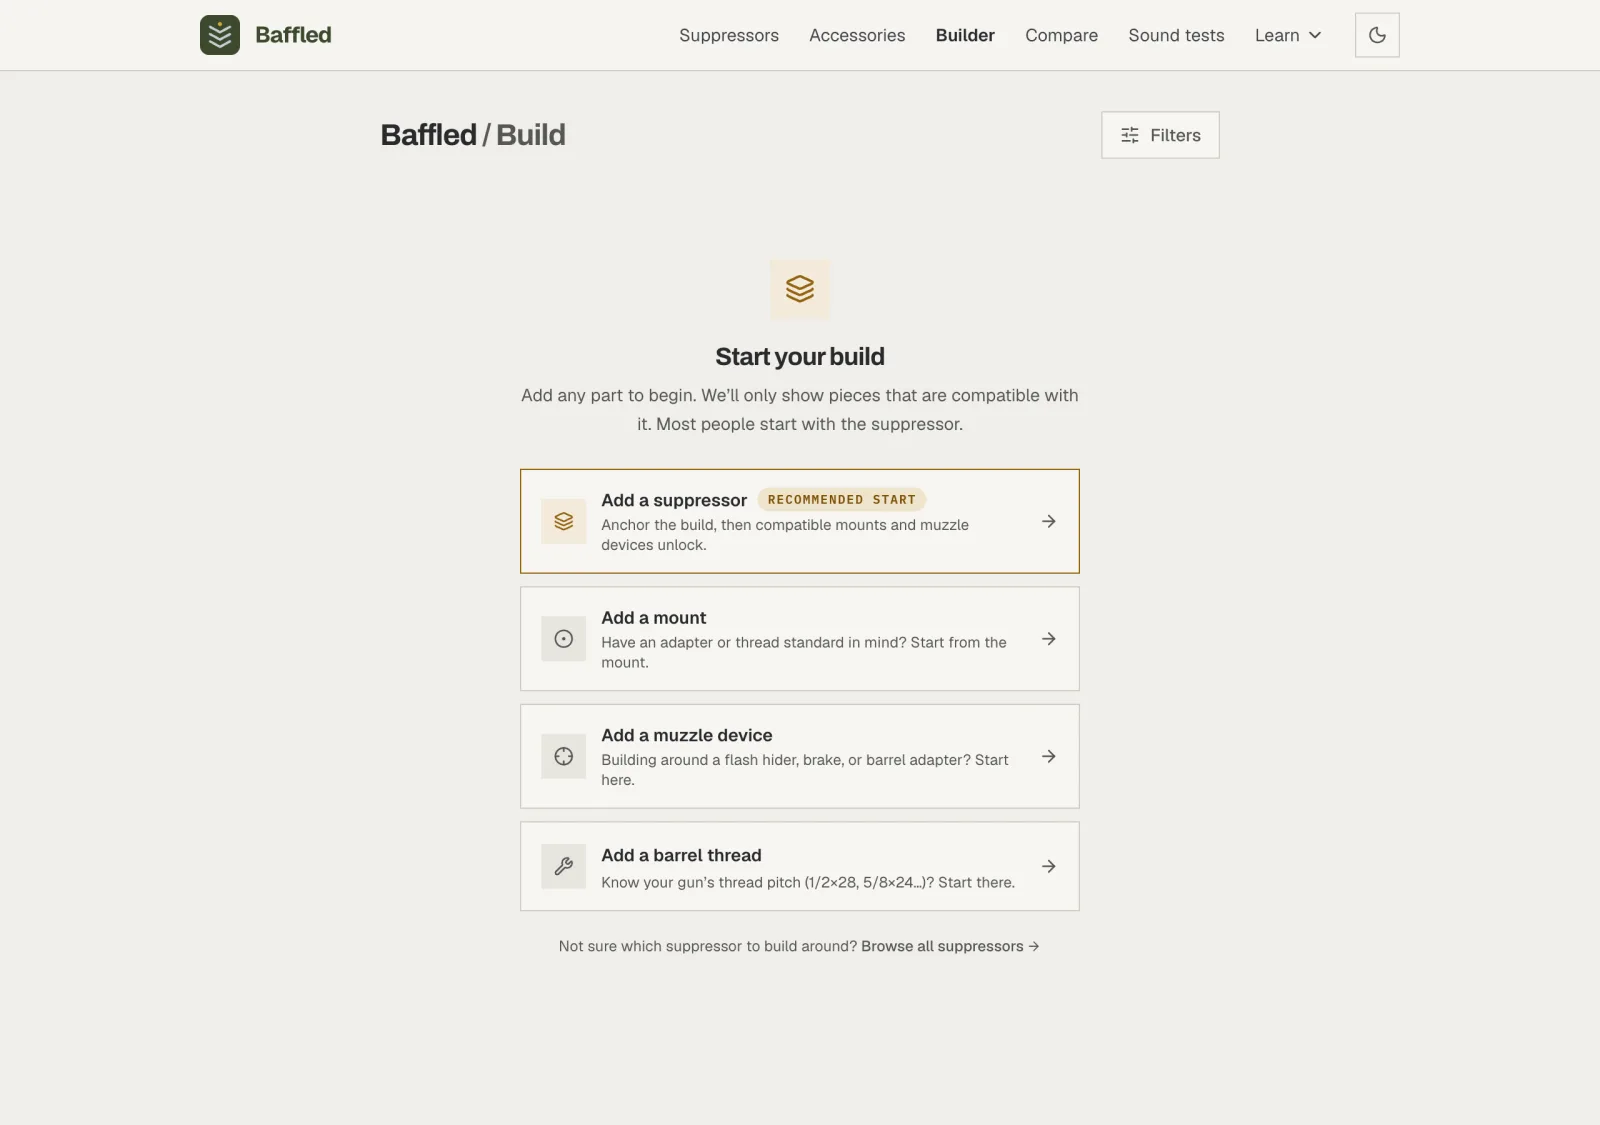
Most people start with the suppressor, but any part can anchor the build. Step 2: Or start from the mount, to commit to one system
You don't have to start with the suppressor. Pick Add a mount and the builder makes your mount the anchor, then suggests the suppressor as the next step with a live count of everything that fits. That's how you shop a single mounting system: if you standardize on one quick-detach system across your hosts, one suppressor can move from rifle to rifle. Here a KeyMo mount is anchored and the prompt offers the suppressors that accept it.
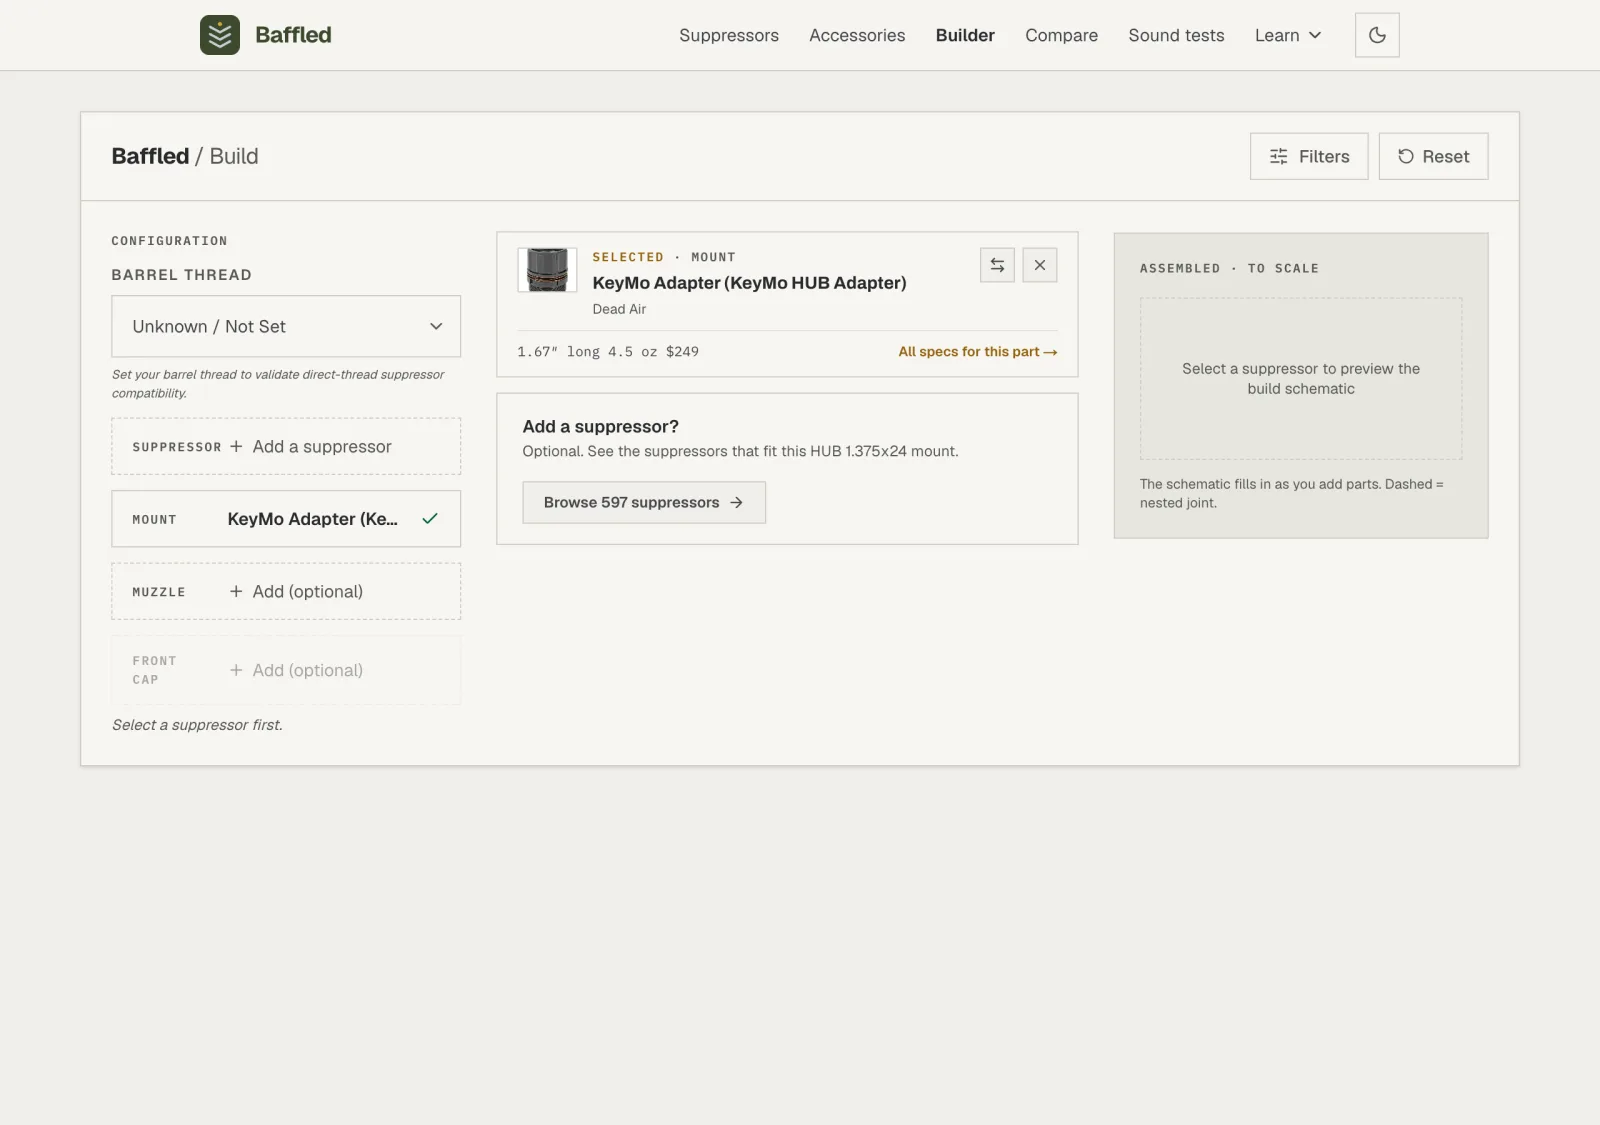
Why commit to a system: Putting the same quick-detach mount on every host lets the suppressor return to zero on each and swap in seconds, so you can buy one suppressor instead of one per rifle.
Step 3: Or start from your barrel thread
The fourth start is for when all you know is your gun. Pick Add a barrel thread and choose your muzzle's thread pitch (1/2x28, 5/8x24, and so on); Baffled then matches the suppressors and mounts that can attach to it. The chooser opens on Common, the handful of pitches most of the catalog uses, with everything else grouped below by inch and metric; type into the filter box if yours is an unusual one. Shotguns come last under their own Shotgun choke heading, because a choke isn't a thread pitch you measure, it's named for the gun it belongs to: pick the one your shotgun takes. The Barrel Thread control stays at the top of the configuration list for the whole build, so you can set or change it at any point.
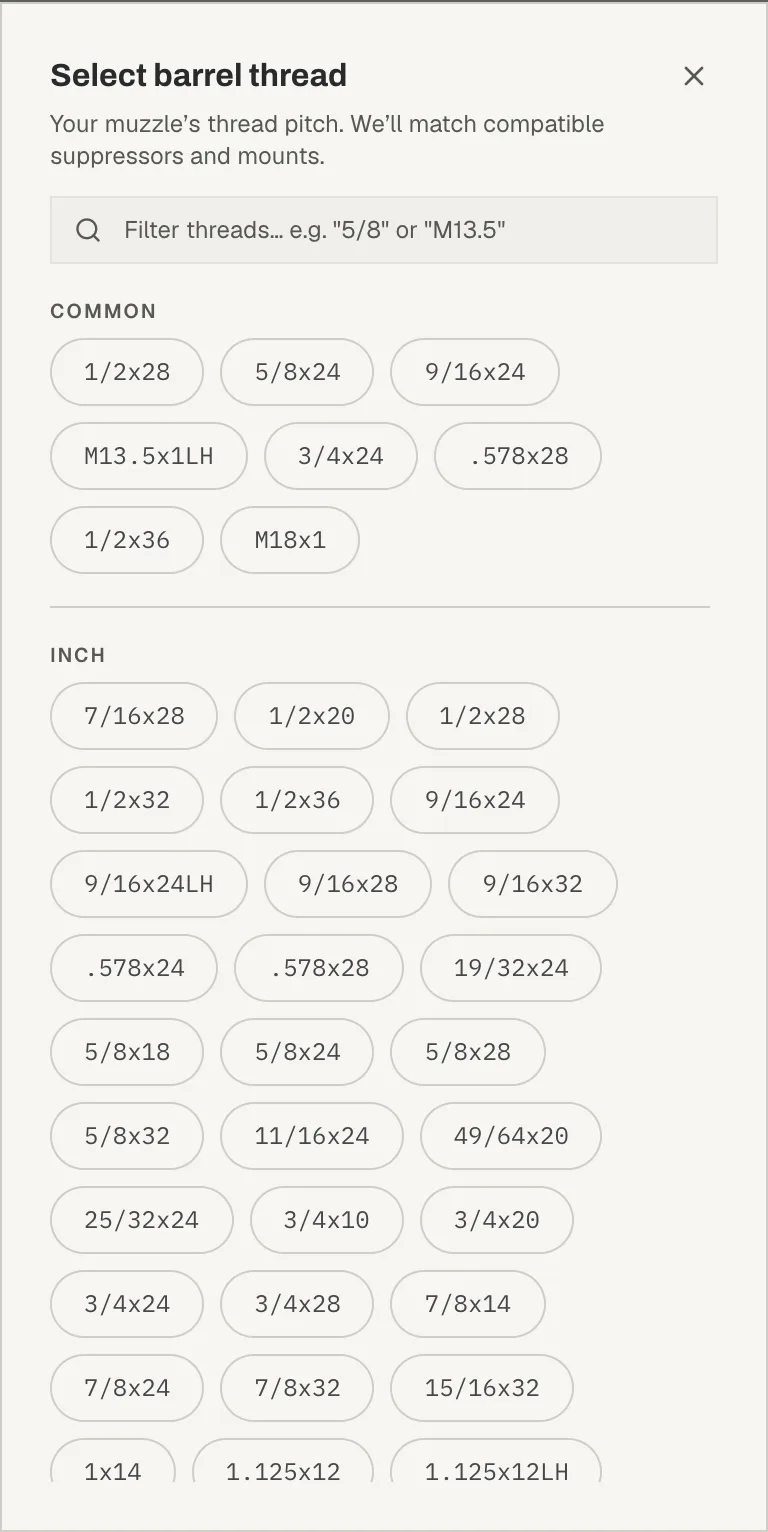
Set it once: Once a part that touches the barrel is selected, the control flips to read-only and shows where the thread was inferred from, so you always know which pitch the build assumes.
Step 4: Pick a suppressor to anchor the build
For this walkthrough we'll start from the suppressor. Click Add a suppressor to open the picker, then search by name or alias and select one. Every later slot is evaluated against the anchor you chose.
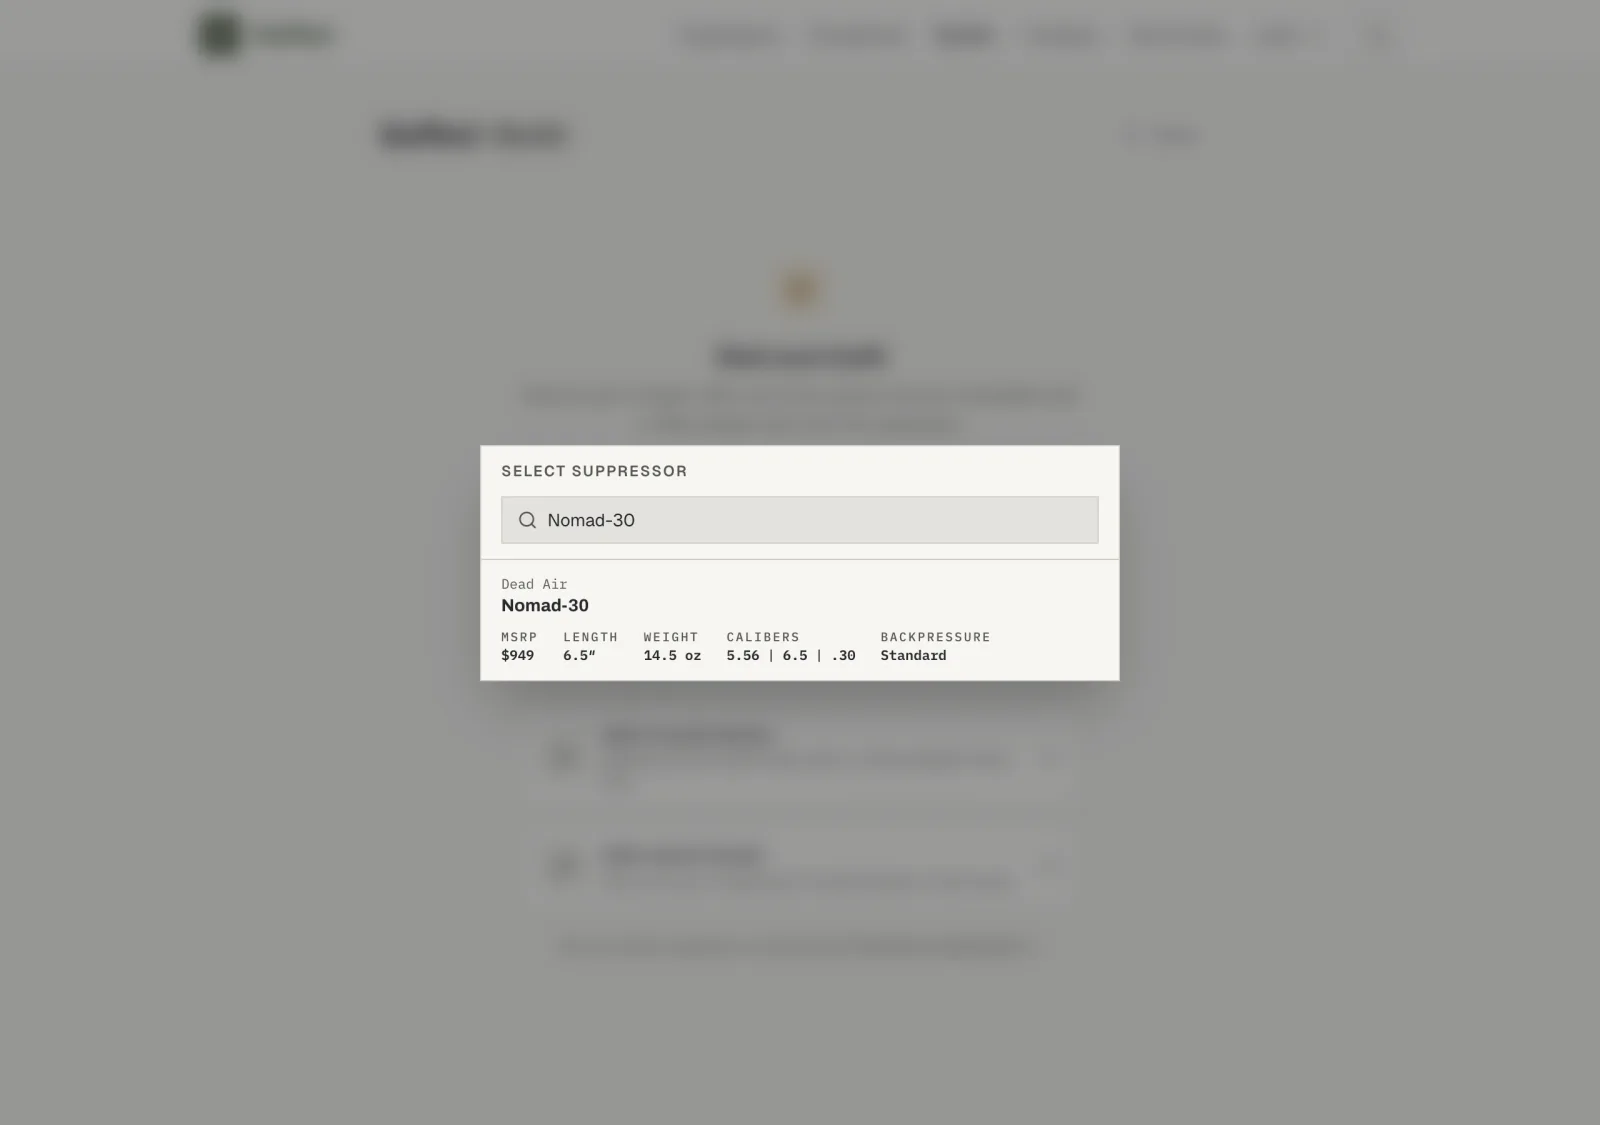
Step 5: The workspace appears
As soon as a suppressor is selected, the Builder becomes one panel: a live results band across the top (length, weight, backpressure, price, and the two build actions), the configuration list on the left with a slot for each part, every selected part in the center, and the schematic on the right. The suppressor gets a full card; each accessory you add gets a short one below it, so the whole build stays on screen. With only a suppressor chosen you see its own length; the numbers recompute with every part you add.
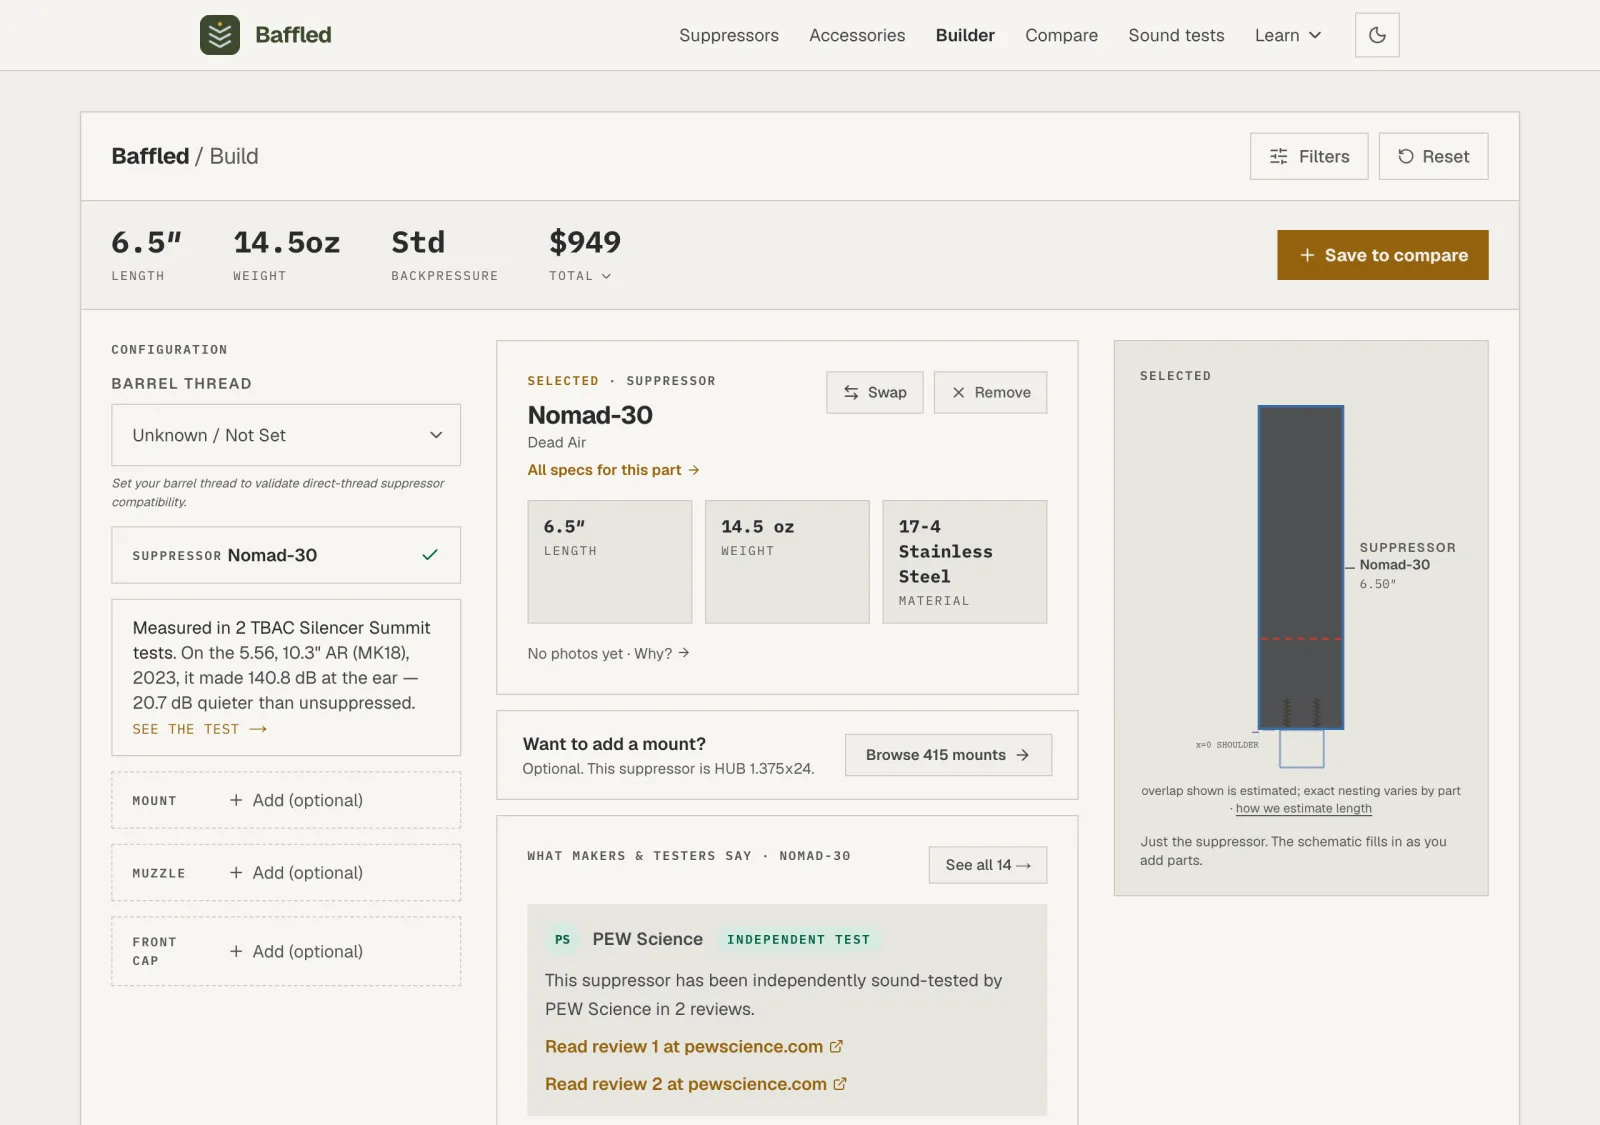
Everything is optional: There is no completion gate. A lone suppressor is a valid build; adding parts just fills in the schematic and updates the totals.
Step 6: Add a compatible mount
Open the Mount slot in the configuration list. The picker opens showing only the mounts that fit the suppressor you chose, because once a suppressor is anchored most of the catalog can't attach to it. A line at the top of the list says how many are being held back, and a Show control beside the search box opens them if you want to look anyway. That's the dependency at work: the mount list reflects your suppressor. Below the search box, a row of chips, System, Attaches to, Brand, and Max price, narrows the list further without leaving the picker; each opens its own small panel, and a chip clears with the × on it or the Clear link beside the row.
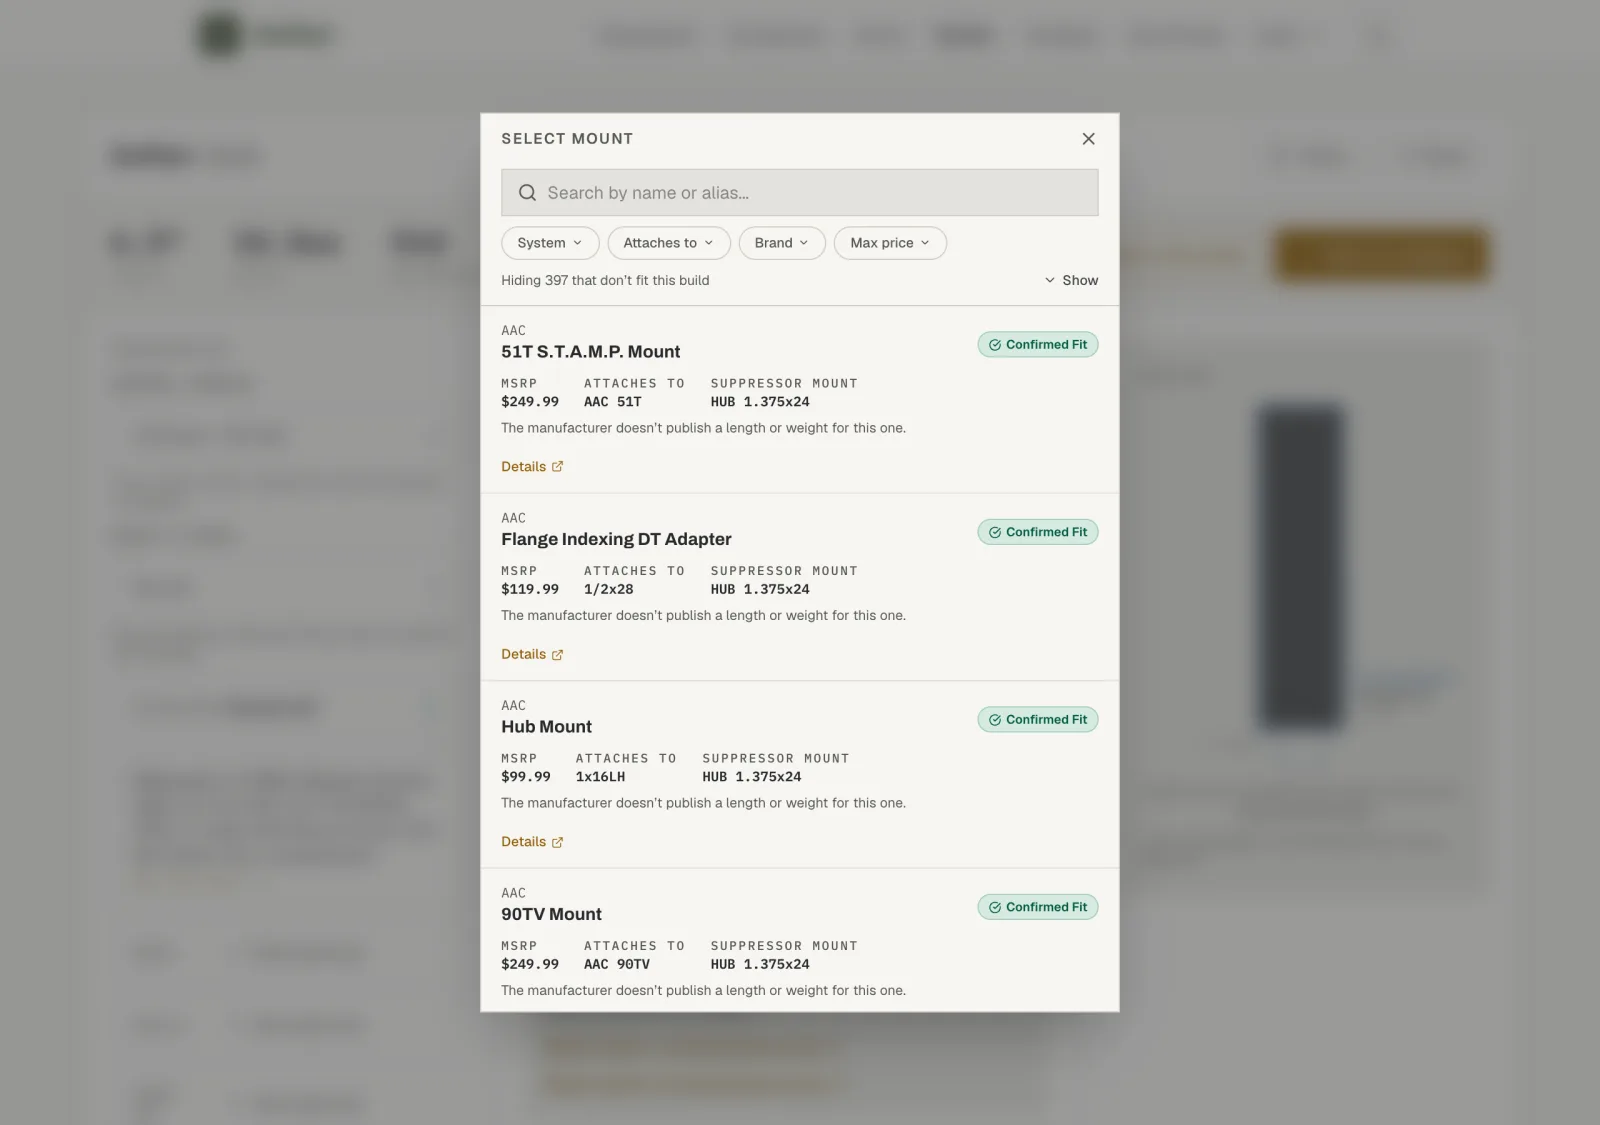
Read the labels: Confirmed Fit means the threads and standards line up in our data. It is not a purchase guarantee, so always verify fitment with the manufacturer before buying. Parts that fail a preference you set, or that we have no data for, stay in the list rather than being hidden, because you may want to overrule either one. That includes a chip filter: a part that doesn't match one stays visible but moves out of the confirmed list, and one with nothing published for that field is marked unconfirmed rather than dropped.
Step 7: Add a muzzle device
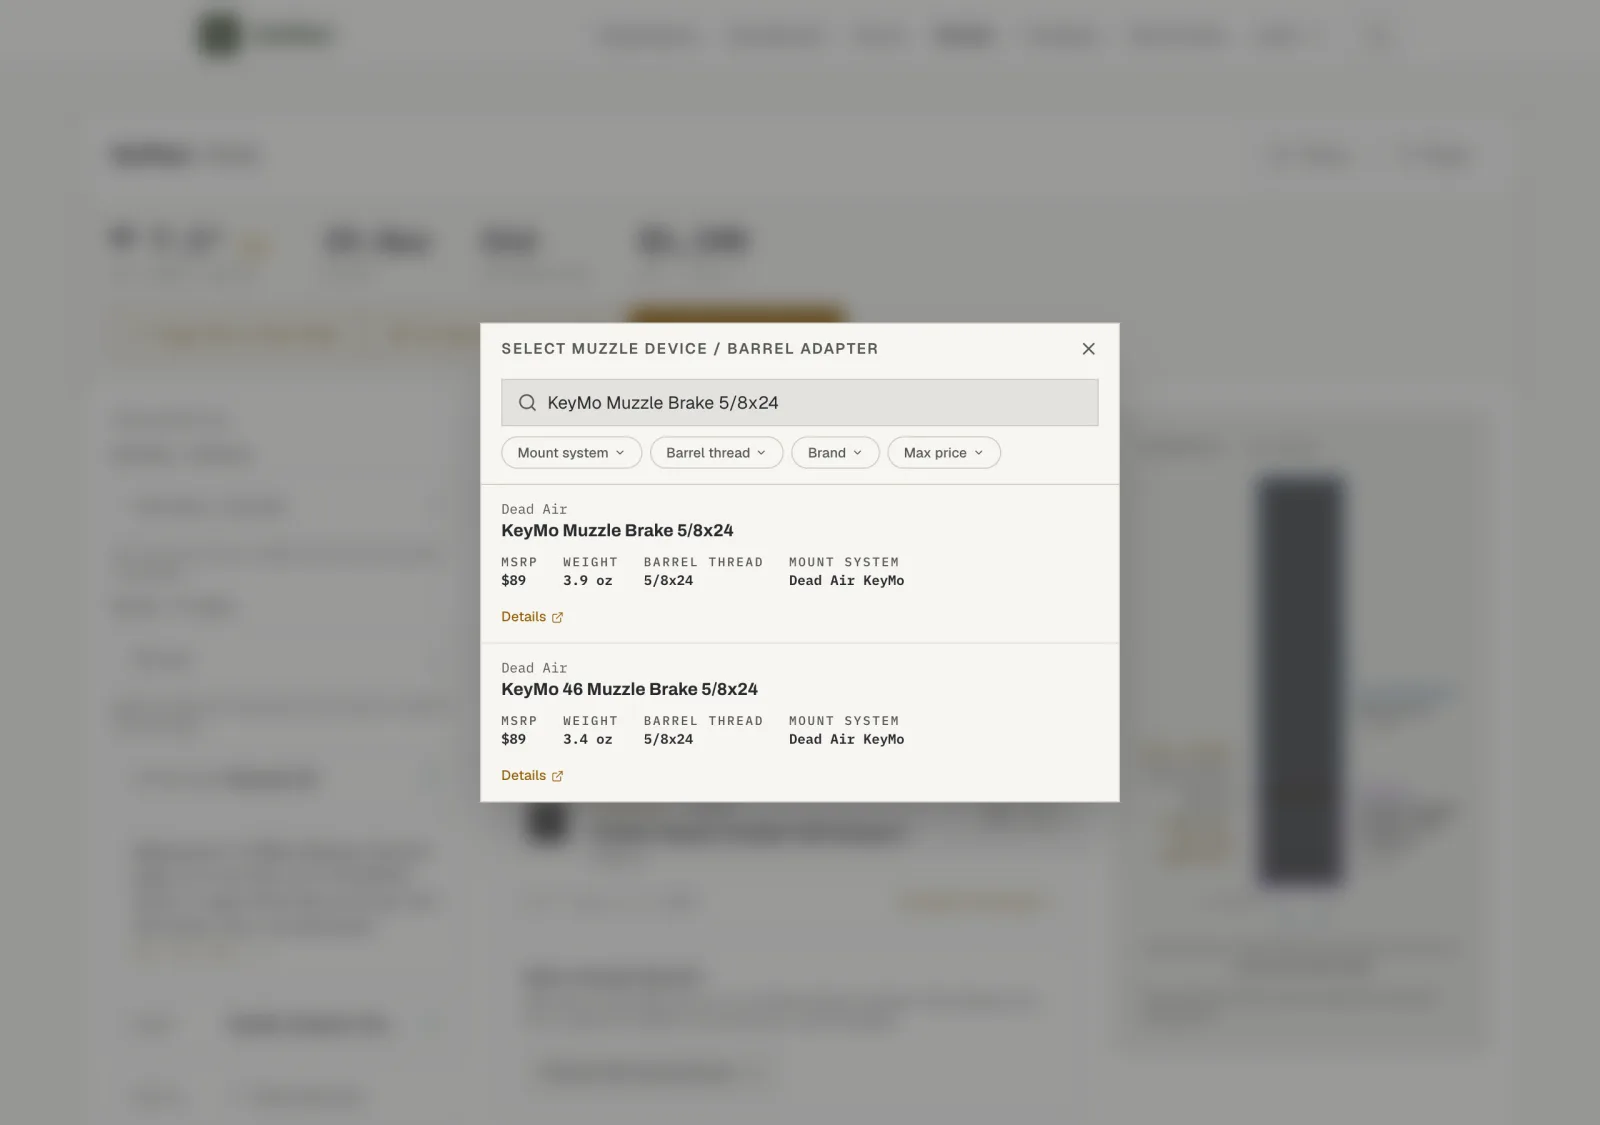
Now open the Muzzle slot. Because a quick-detach mount is selected, the candidates are the muzzle devices that lock into that mount at your barrel thread. Change the mount and this list changes with it. Once you pick one, its thread becomes the build's barrel thread and the Barrel Thread control shows where it was inferred from. This picker carries its own chip row too, scoped to muzzle devices: Mount system, Barrel thread, Brand, and Max price.
Step 8: Add a front cap when the suppressor allows
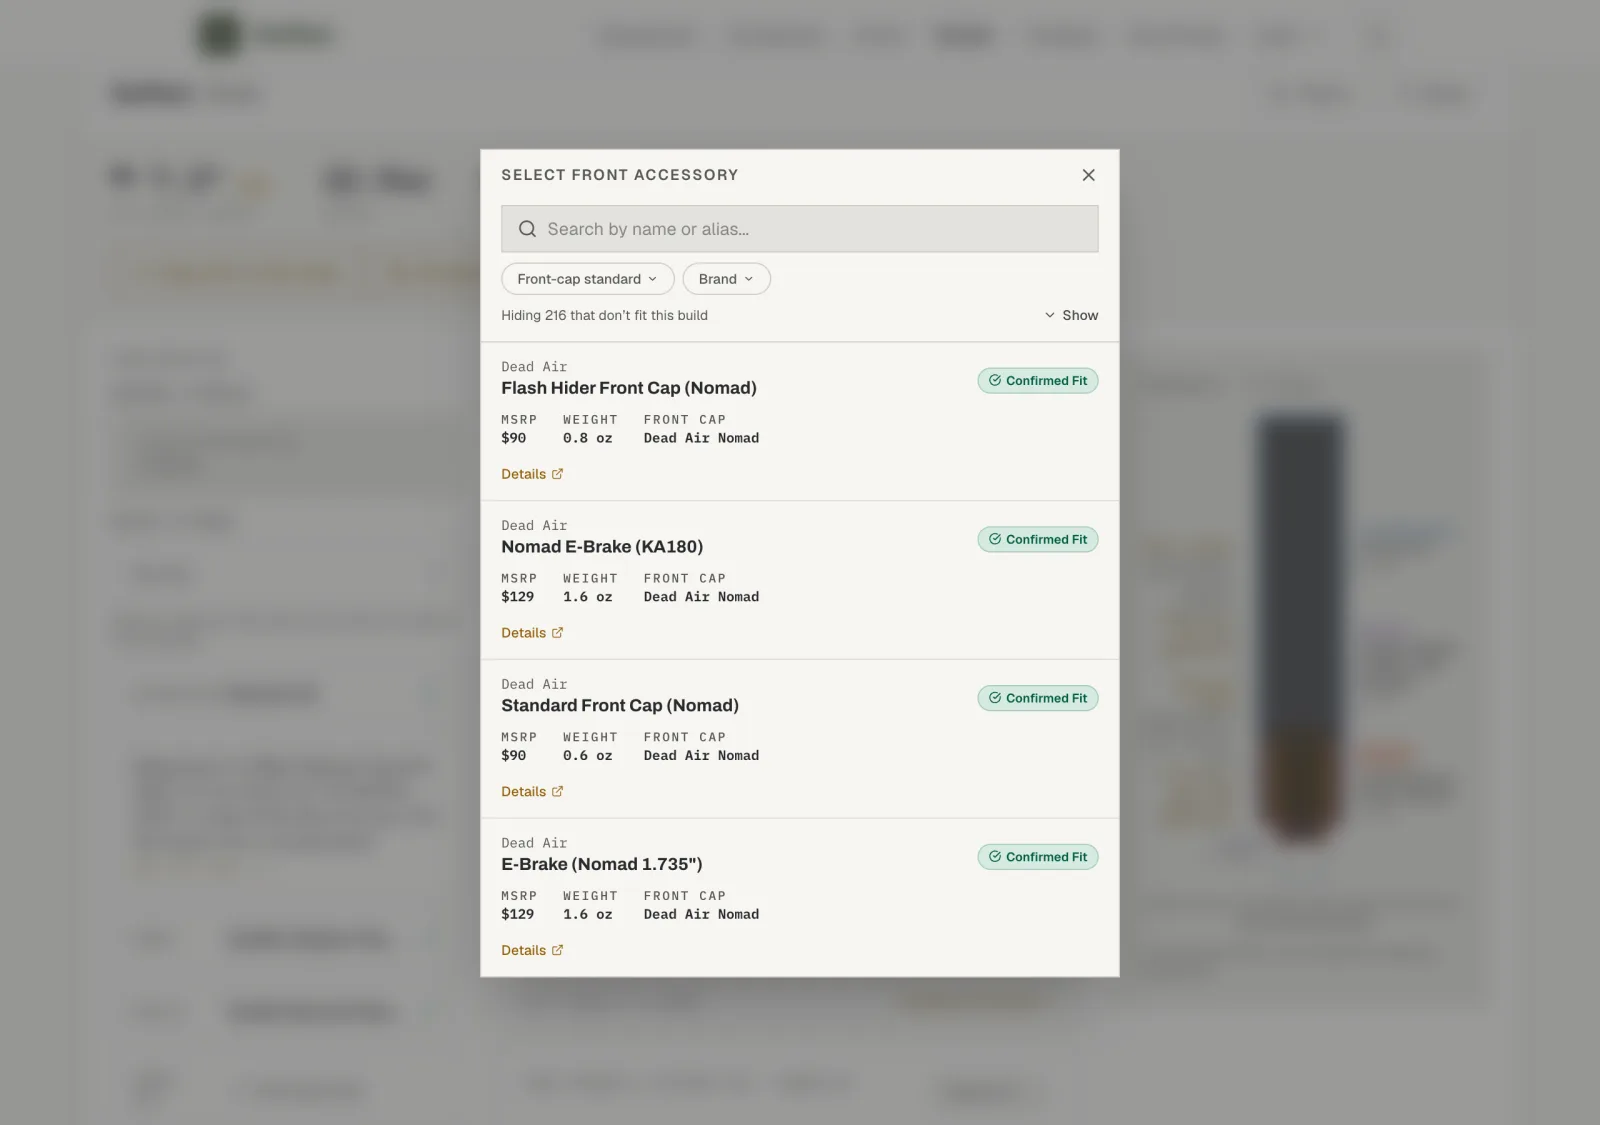
Some suppressors accept a modular front cap or brake; others ship with a fixed front cap, in which case the Front cap slot is disabled with a note explaining why. When it's available, pick a front accessory to complete the stack. Two chips narrow this picker as well: Front-cap standard and Brand.
Step 9: Read the build output
With the stack assembled, the results band shows net added length, total weight, and an estimated total price added up from each part's MSRP, the manufacturer's suggested retail price. The schematic draws the parts nested to scale with each overlap called out. Net added length is less than the sum of the parts because they overlap inside one another. Click the total to see the per-part price breakdown. Where the measurements allow it, the schematic also draws the gap between the muzzle device and the suppressor's first baffle, and credits whoever published the depth it used.
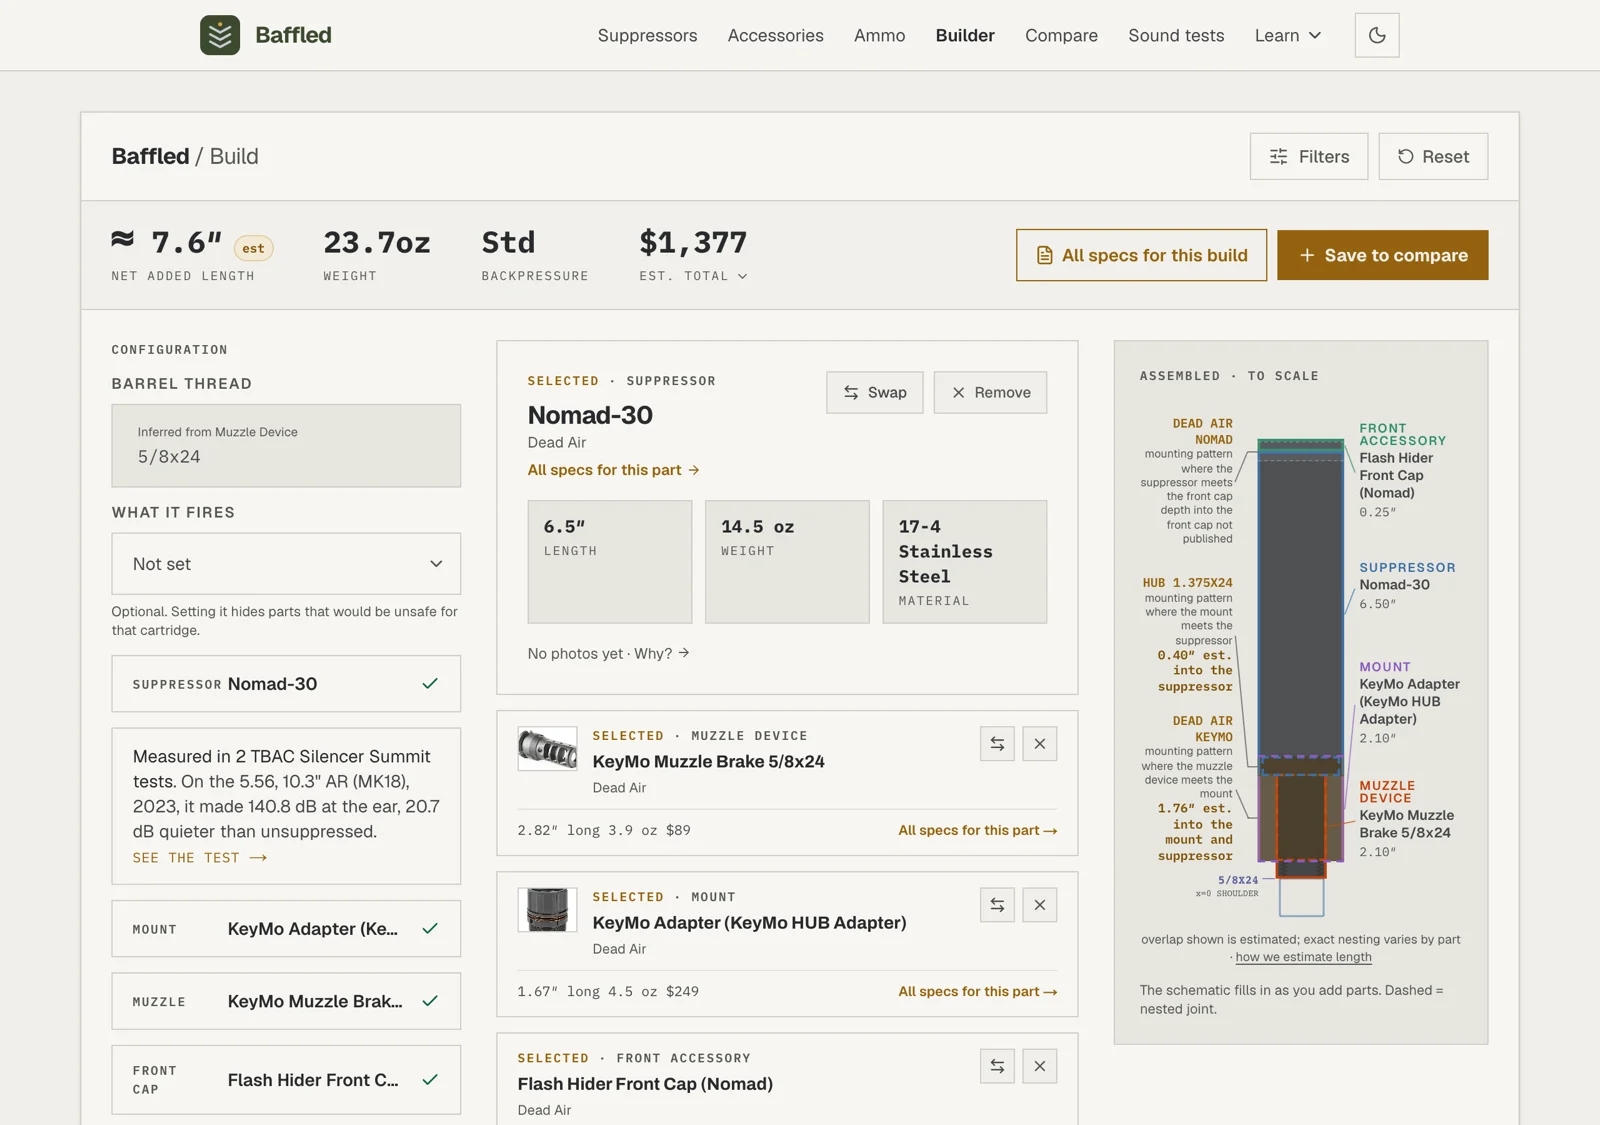
Verified vs. estimated: A plain number is verified: we have a source-backed measurement for that exact pair of parts. ≈ est means the overlap came from the interface standard instead, rounded off. ≤ means a joint's overlap is unknown, so nothing was subtracted there and the real length is at most the number shown. On the diagram, ≈ beside a single part means its whole physical length is drawn because how much of it ends up buried was never published, and a dashed hatched block is a part that publishes no length at all. Unpublished specs say “unpublished” rather than being guessed.
Step 10: Check what the build is safe to fire
Two parts screwing together and a build being safe to fire are different questions, and the Builder answers both. A mounting standard like HUB 1.375x24 is a thread specification: it promises the threads match and says nothing at all about caliber, the bullet diameter a part is bored for. The build shown here is a real one a reader sent us. A 9mm mount threads perfectly onto a 5.56 rifle suppressor, every joint lines up, and firing it drives the bullet into the inside of the suppressor instead of through it. The caliber check panel sits under the results band and says so in plain words, along with how it knows.
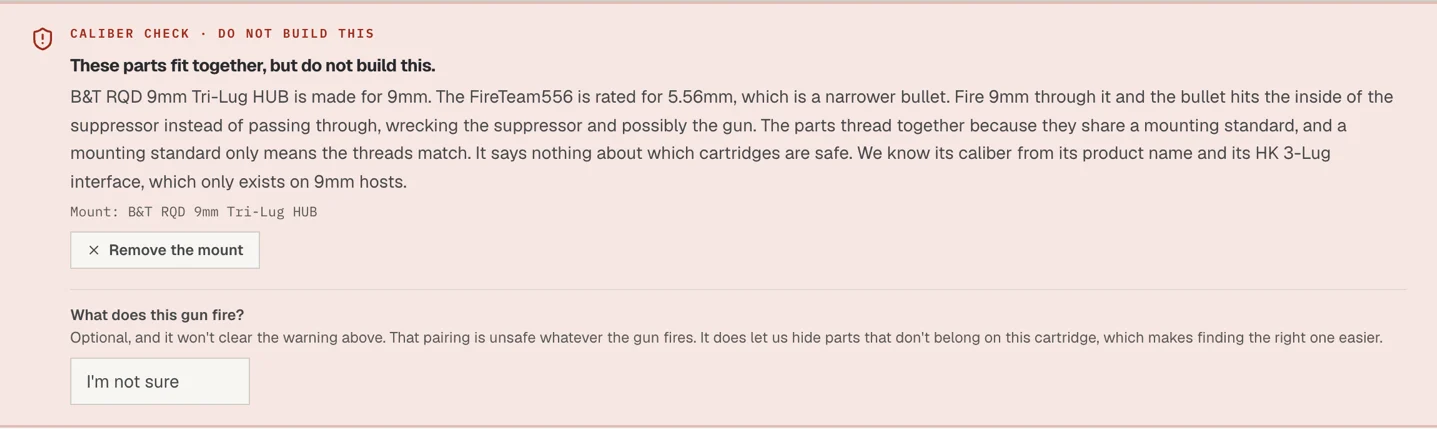
Nothing about the fit is wrong here, which is exactly why it needs saying out loud. Three answers, not two: Red means do not build this, and nothing you tell us changes it. Yellow means the parts point at a wider cartridge than the suppressor takes, so it comes down to what your gun actually fires. Grey means a part never published what it is bored for, so we say we can't confirm it rather than assuming it's fine. A build with no problem shows no panel at all. Under it, What does this gun fire? is optional: answering hides parts that don't belong on that cartridge, which makes finding the right one easier.
Step 11: See the evidence behind the specs
The “What makers & testers say” card on the stage collects the sourced claims for the focused part. It shows what the manufacturer states, and where a tester has covered that suppressor, the card notes the test and links to it. Use See all to read the full record. Independent testing is on file for some suppressors, not all, so many cards are manufacturer claims only.
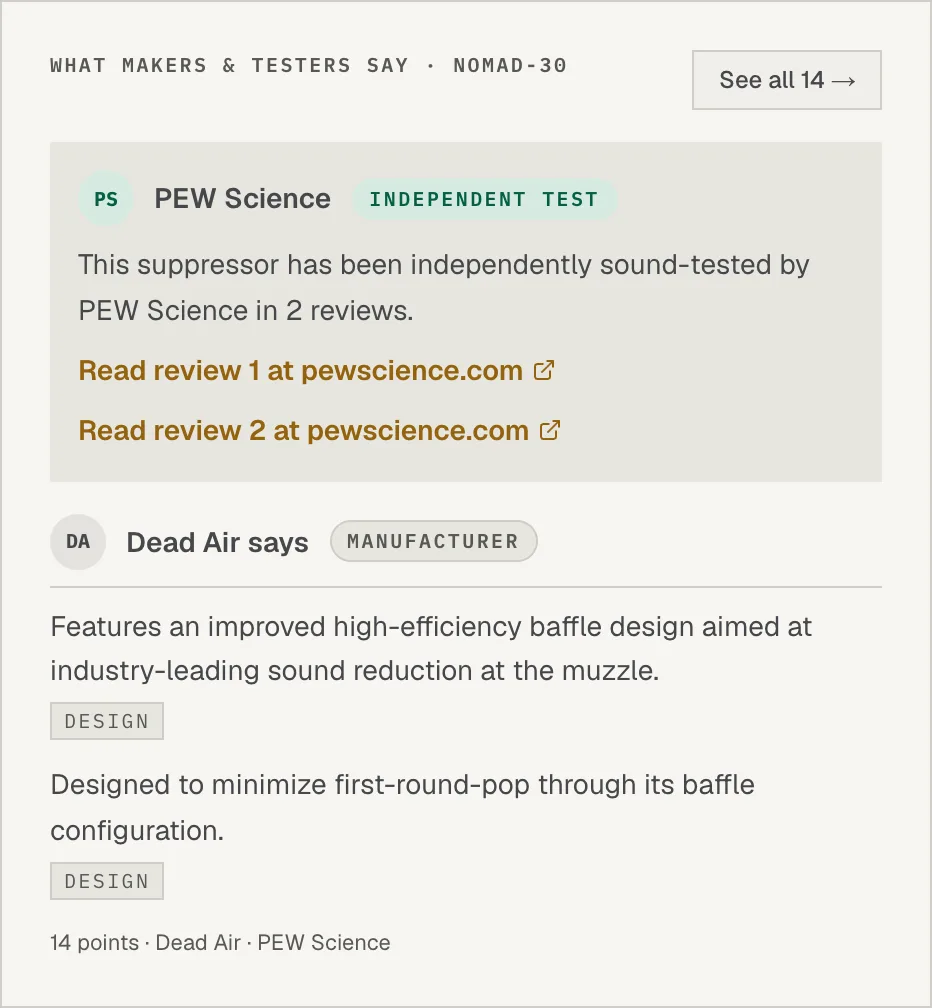
Manufacturer statements, plus a link to the independent test where a tester has covered the suppressor. Step 12: Open Build Details for the full record
The Builder stage stays light on purpose: a short line of figures per accessory. “All specs for this build”, in the results band, opens a read-optimized page for the exact build you've assembled, with the totals, the assembled diagram, every part's complete spec sheet, and the sourced evidence in one place. Its URL encodes the whole configuration, so you can share it or bookmark it, and Edit build drops you back into the Builder. To read up on one part rather than the whole build, each card has its own “All specs for this part” link.
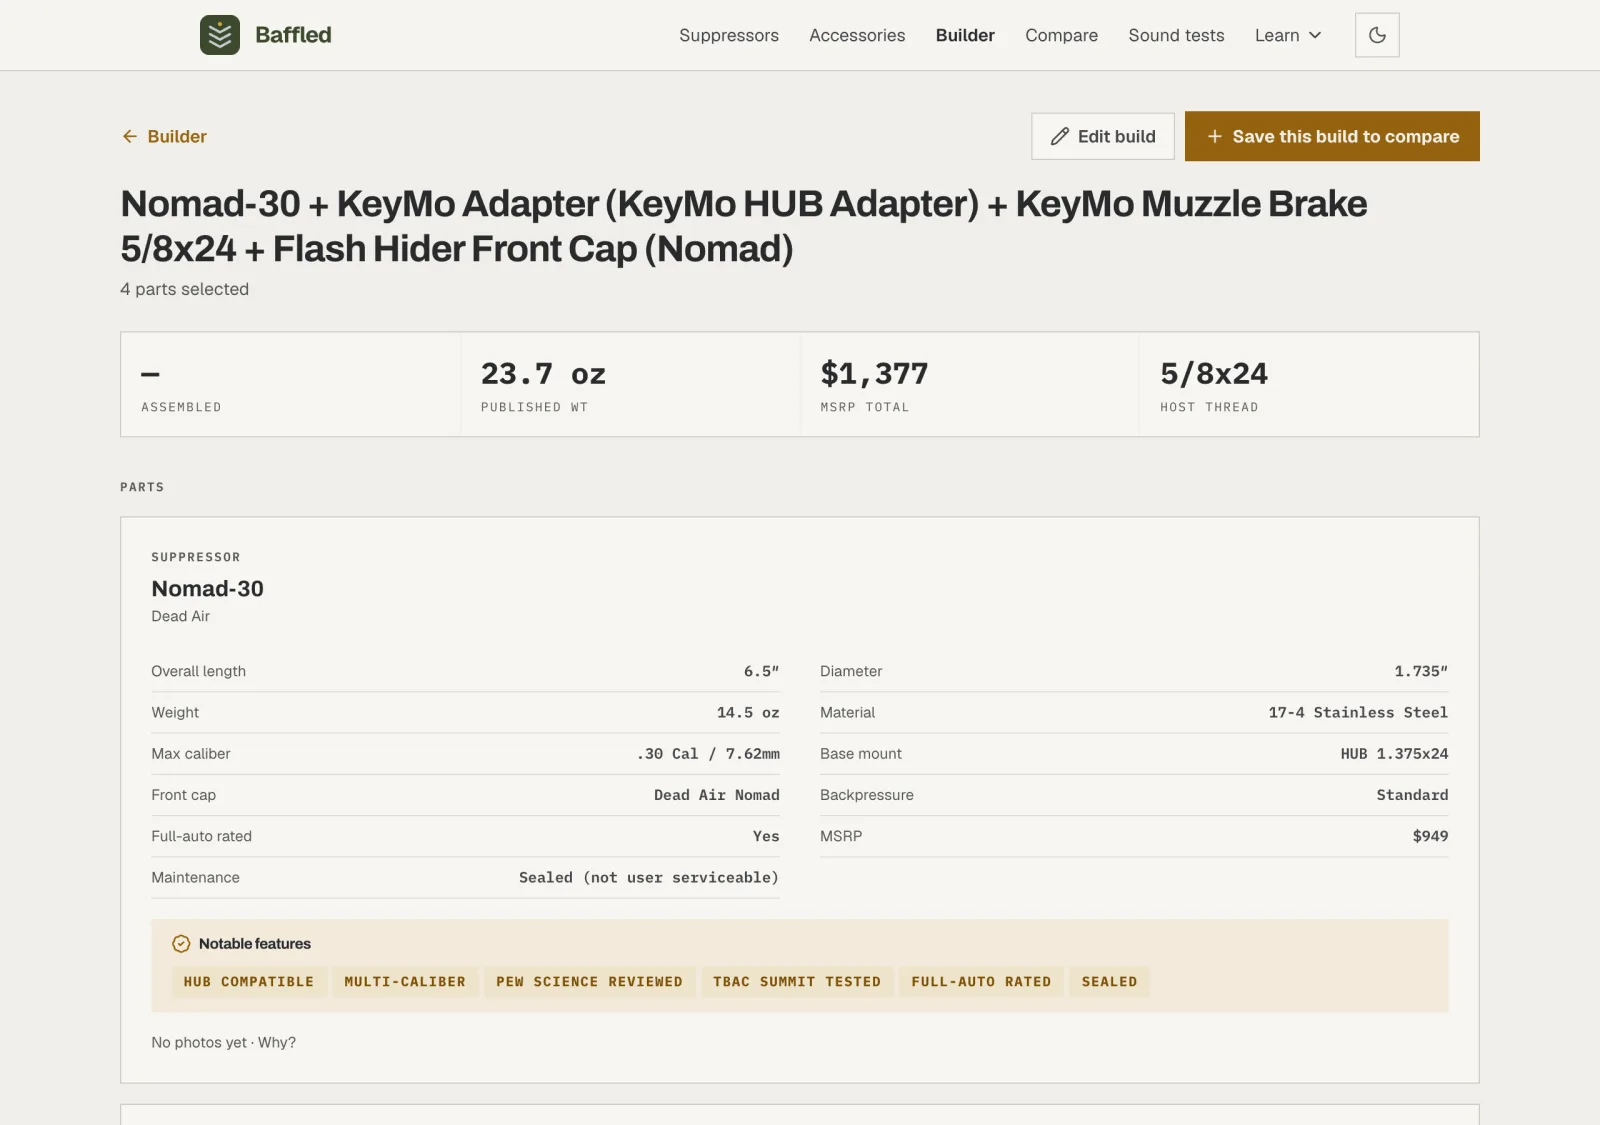
A shareable page for one exact build: specs, schematic, and sources. Step 13: Send it to Compare
Use Save to compare in the results band to save the finished configuration to the compare tray. Build a few variations the same way, such as a lighter suppressor or a different mount, then open Compare to weigh them against each other.
